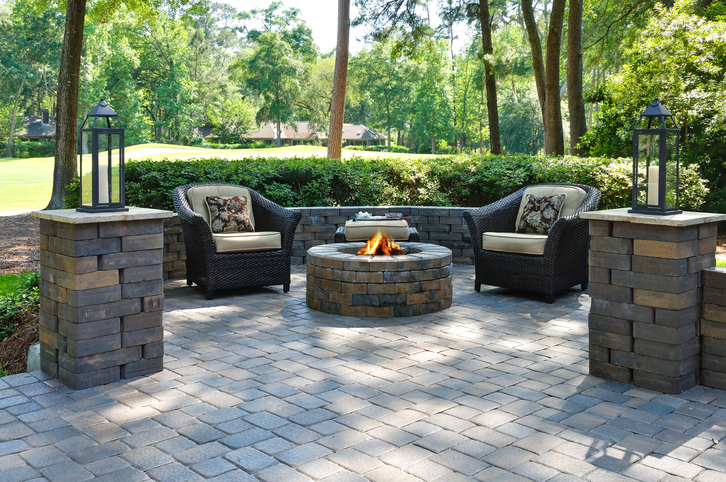
Not only does adding a paver walkway increase your curb appeal, but it’s also really easy to construct and can be completed in one weekend. Check out this step-by-step guide to learn how to build this landscaping feature and make it a focal point in your front or back yard.
1. Plan Your Walkway
Be sure to consider the distance, elevation, and amount of use your paver walkway will receive as well as the overall design and look of your property. We suggest building your walkway in sections so that you can easily handle elevation changes. Be sure to layout the course of your walkway with rope and use a tape measure to check the width of your path. If you’re planning to build a walkway that lets two people walk next to each other comfortably, we recommend making it 35 to 40 inches wide. After planning out your dimensions, mark the entire perimeter of the walkway with a shovel.

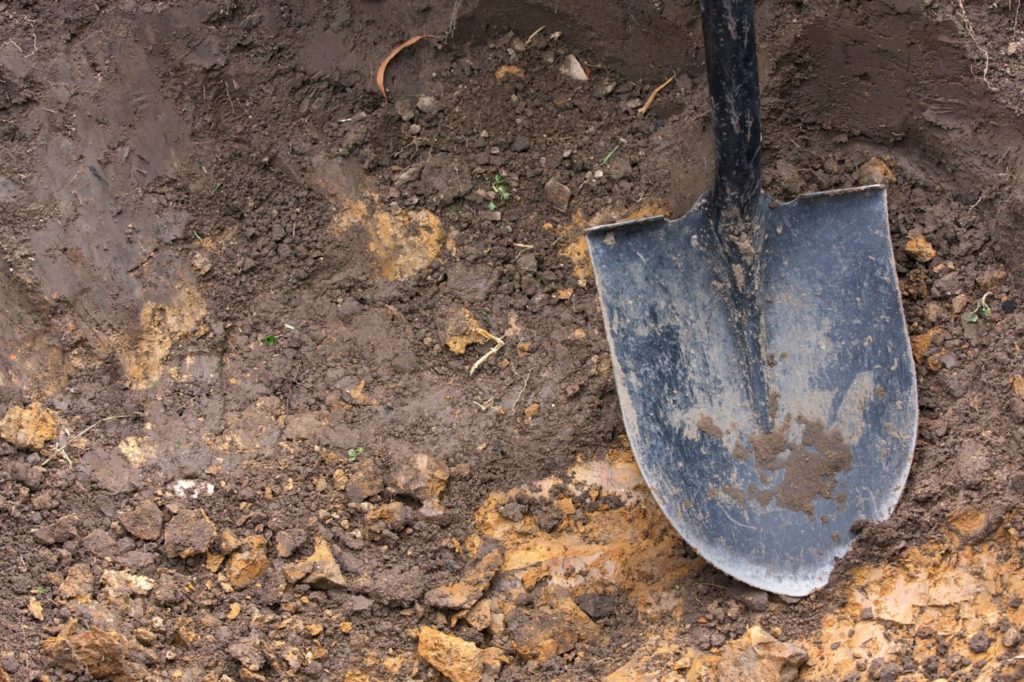
2. Dig Out the Soil or Clear the Old Pathway
Use a sharp blade or shovel to remove rocks and sod, then dig a trench about seven inches deep. Compact the soil in the bottom of the trench by using a hand tamper to make the soil surface firm. If you’re trying to replace an old walkway with pavers, remove the old walkway with a jackhammer and dispose of the old pieces.
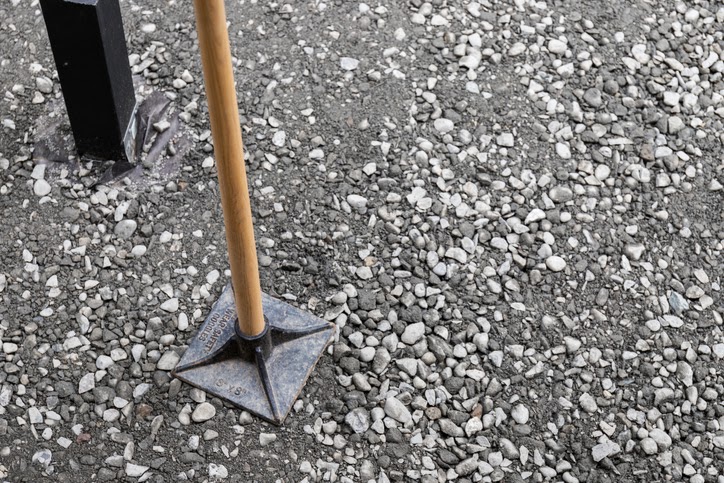
3. Build a Gravel Base
Add at least a 4-inch layer of crushed gravel over the compacted ground to create a base for the initial section of your walkway. Use a landscape rake to spread the gravel evenly, then wet it down with a hose and compress it firmly with the hand tamper. Continue to add more crushed gravel as needed and tamper it down until the gravel base is slightly below ground level.
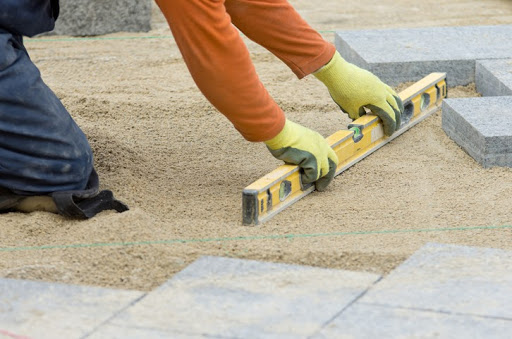
4. Add Paver Sand
Spread about 1 inch of construction sand over the walk area, then place two 1” pipes on either side of the paving area. Place a level across the pipes and add sand under the pipes until they are level. Using the pipes as rails, drag a board the length of the area and screed the sand. After creating a smooth area, remove the pipes, fill any indentations with sand and smooth the area with your hand.
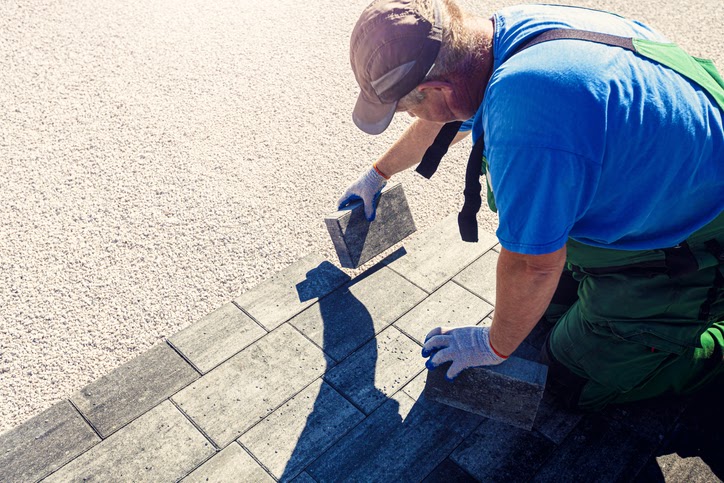
5. Lay the Pavers
Take your pavers and lay them gently on top of the leveled sand. Be sure to not push the brick into the sand as it will make your walkway uneven. For a simple running bond pattern, use half blocks to begin every other row. A running bond pattern will stagger the joints so that you can make small adjustments if needed and create a nice, gentle curve to your walkway.

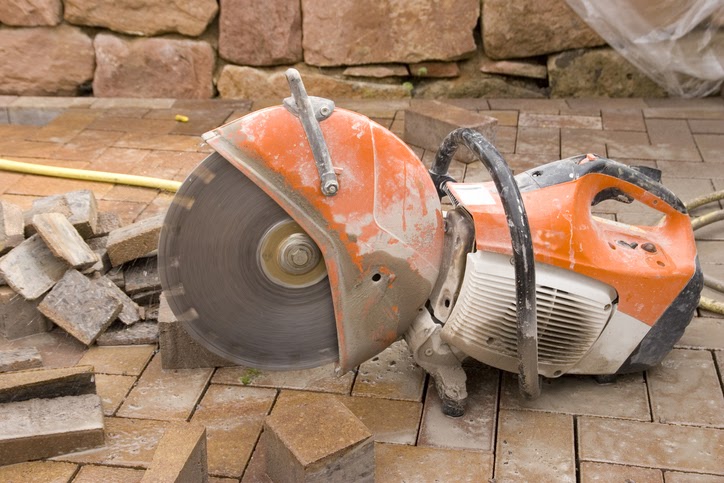
6. Cut Pavers for Curves
If your walkway has curves, you’ll want to rent a concrete or wet saw to cut a few bricks and keep the curve. Be sure the saw has a diamond-coated blade and not an ordinary masonry blade, as they work better with quick cuts. Mark where you’d like to cut the brick with a pencil and take your time with sawing. Protect yourself by wearing safety glasses, work gloves, and a dust mask when cutting pavers.
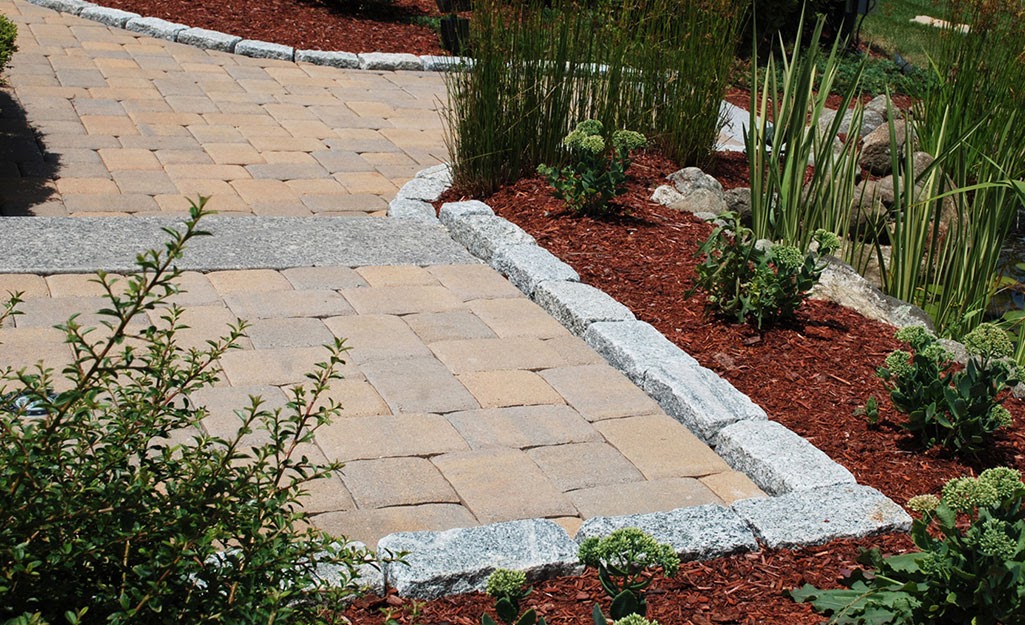
7. Secure Edges
Once all of your pavers are laid, add in paver edging to keep them from shifting, or use a brick trowel to build a trench along the outside. If you decide to trench alongside the outside of the pavers, you should use paver edge restraints and paver nails to prevent them from shifting later on, and hide them with mulch or soil.
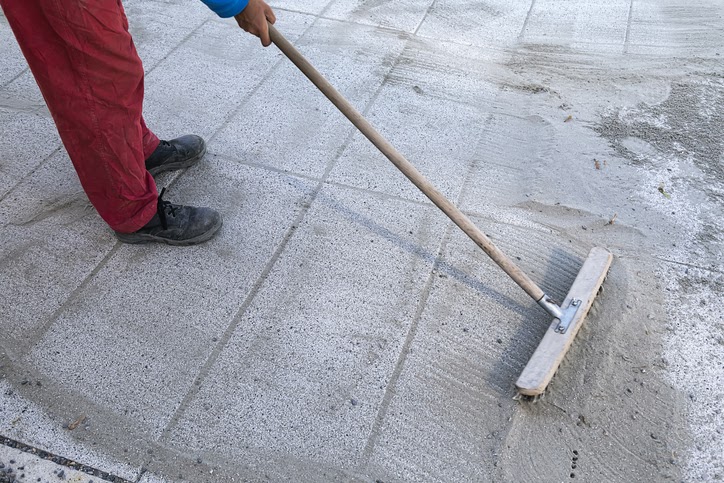
8. Fill in the Gaps with Polymeric Sand
After all of the pavers are laid and in place, pour an abundant amount of polymeric sand onto your walkway and use a push broom to sweep it into the cracks. The sand works as a binding agent and will keep the pavers in place. Blow off the excess sand with a leaf blower, then spray the walkway with a fine mist of water. The water will then activate the polymeric sand and bind the pavers.
Ready to get started on building out your paver walkway? Check out our vast selection of paver products and get in touch with one of our experts to determine which pavers will suit your landscaping space best.